Showing posts with label In the Kitchen. Show all posts

Wednesday, November 26, 2014

In the Kitchen: Chocolate Peanut Butter Pie

{I actually took these pictures last year and meant to write a blog post, but I never got around to it.}

I am not huge fan of cream pies or really anything besides a fruit pie. I mean this generally, just because whenever someone has made some sort of cream/chocolate/custard pie it is often made with a Jello mix, which I am not a fan of. I do believe cream type pies can be really delicious, and I have made some--but I still usually prefer apple, blackberry, pumpkin or any other fruit one to a cream one. However, this pie is the exception. 

My mom makes this pie often and she adapted it from a family recipe. 

This pie starts off with an Oreo crust. The actual recipe calls for chocolate graham crackers, but I modified it and found it better. I did not actually use Oreos, but used Trader Joe's Jo-Jo's, which I think taste better anyways.

This pie is made up of two peanut butter layers separated by a thinner chocolate layer. Do not be cheap with ingredients! Buy quality chocolate! At the very least, use Ghirardelli's  60% cacao chocolate chips.

This recipe is simple and well, not something I would really look at and think, "Oh, I should make that!"---But---it really is a delicious pie. I am really picky when it comes to pies and crust and what people put on their blogs as recipes. If the blogger does not make their own crust (i.e. store bought), do not trust them, if they use a mix of any kind, do not trust them, if they make pies using exorbitant amounts of candy, do not trust them. Basically, it really bothers me that when I go to find a recipe somewhere on the internet, I find a lot of supposedly "food" blogs that basically just are telling you how to combine store-bought items. Not cooking. Not baking. It is just a lot of preservatives, etc. and it always tastes better to make it from scratch. Granted, I did not make my own chocolate wafers to grind up for the crust--but I did try to find a better, slightly healthier substitute over Oreos. Sorry about the rant. It could have been much longer.


The recipe is as follows:
Crust:
2 cups crushed Jo-Jo's/Oreos (including the cream filling)
2 tbsp melted butter

Mix together and then press into a pie dish, going all the way up the sides. Bake at 350 for 5-10 minutes, should be fragrant. Let cool.

Pie Filling:
1 cup creamy peanut butter (use an all natural one, without the added sugar and palm oil--you really don't need more sugar!) 
8 oz, cream cheese, softened
1 cup sugar
2 tsp vanilla
8 oz already whipped cream (about 1/2 cup un-whipped cream)

Mix all of the above ingredients with a mixer, except the whipped cream. Once everything is well mixed and smooth, fold the whipped cream into the peanut butter mixture. Set filling aside.

Chocolate layer:
6-8 oz dark chocolate

Melt over a double boiler over low heat.

To assemble:

Spread half of the peanut butter filling into the pie dish. Pour all of the chocolate over the peanut butter filling and spread out evenly. Spread the rest of the peanut butter filling evenly on top. Chill in the refrigerator until set. 

Thursday, November 21, 2013

In the Kitchen

Remember when I used to do recipes every week? I hardly do. Something about summer and well, there is no real excuse actually. I have even taken pictures of food, made up some recipes and baked a lot, but they have just not made it on here. Sorry 'bout that.

I did however, recently make some really, really good cookies. I have this friend who is pretty much a pro cookie maker/decorator (check her out here) and decided to make one of her recipes. She has a recipe for Chocolate-Cinnamon Roll-out cookies and they sounded pretty good and I had some newish cookies cutters I wanted to use, so I made them. 

I was a tiny bit unsure if they were going to be good or not, you just never know with an untried recipe. These cookies are good on their own, but better with frosting. I made a cinnamon cream cheese frosting and the flavors went so well together, which caused my mouth to have a happy explosion. I had to keep giving them away because it was physically very difficult to stop myself from eating them. 
Little goof. We love making cookies together!
This recipe makes quite a few cookies, though is all depends on the size of your cookie cutters (I filled up four cookie sheets). So, maybe this is a good one to add to your Christmas baking list? My frosting recipe is also quite large as it was able to frost all of the cookies and there was still a little left over.


I made up my own recipe for the cinnamon cream cheese frosting. The only problem is that when I make stuff up I just add things until it tastes right. So, I am just guessing on measurements. So, don't make this if you like things to be just so with exactness and all that stuff, because that is just not how I roll. 

Cinnamon and Brown Sugar Cream Cheese Frosting
1-cup salted butter (2 sticks), softened
1- 8 oz. package of cream cheese, slightly softened
2 tsp. cinnamon--this is about the right amount, start with 1 tsp. and go from there. You might even need more than 2 tsp.
1/8 tsp. nutmeg
1 1/2 tsp. vanilla
Roughly 3/4-1 cup brown sugar--perhaps there was more or less (just to taste)
Roughly 3 cups of powdered sugar, more or less depending on sweetness and texture

Place butter and cream cheese in your mixing bowl and beat until fluffy, about 3-4 min. Next, add in the powdered sugar, vanilla, cinnamon, brown sugar and nutmeg. Beat until light and fluffy (5 minutes or so), oh, you know, just to the perfect frosting consistency. Taste and test consistency and add more of anything if it needs it. If it is not fluffy enough, add more powdered sugar, the cinnamon flavor is not quite a much as you would like, add more cinnamon, etc. You can do it. This is how I cook and often bake all the time. Next time I make this, I will try to measure out everything and if you are lucky I will update this post.

A few tips:
--Don't frost all the cookies at once (unless you are giving them all away), keep your frosting in the fridge and frost before you eat. In my opinion, the cream cheese frosting is better fresh, rather than sitting there and getting crusty.
--When rolling out these cookies, and any roll-out cookie, do not roll too thin. The cookies should be quite thick, so roll out the dough to about 1/2 -3/4in.
--Most roll-out cookies are better the next day and keep for quite awhile. I found that to be the case with these cookies.
--Try baking two trays and freezing the rest of the dough for later use (you might find yourself getting it out only a week later).
--After you cut out your cookies, place them on your cookie tray (with parchment paper if possible) and put them in the freezer for 10 minutes. This will prevent your cookies from spreading. 
For example:
uncooked.

cooked. 
You should really try these cookies with the frosting. They are just tantalizingly delicious. 

Oh, and a fun fact about me: When I was a kid (8-11ish), I thought I made up the word "tantalizing". I guess I didn't.

Wednesday, May 8, 2013

In the Kitchen: Eggs Jeanette

I love eggs. 
There is so much you can do with them (cakes, mousses, cookies, soufflés, hard-boiled, poached, fried, in a sandwich, on toast, pancakes, eggs benedict, egg lorraine, eggs jeanette, need I go on?).

This recipe is from Jacques Pepin, a French chef who moved to America. After reading about him and some of his recipes, I really need to get one of his cookbooks! This particular recipe was made up by Pepin's mother during World War II. They were living in rural France and had very little money and Pepin's mother made this dish often for her family. It is delicious.

I found two recipes, but they were slightly different. I made this one, with some adaptions, but would like to try this one because it has red wine vinegar in it. Here is what I did:

Ingredients:
6 large eggs
1 tsp chopped/crushed garlic
2 tbsp chopped fresh parsley (I think you could try all different sorts of fresh herbs, chives and dill come to mind)
2-3 tbsp. fresh milk
salt and pepper
2 tbsp oil for frying

Dressing:
2-3 tbsp leftover egg stuffing (from above)
4 tbsp olive oil (the other recipe calls for 2 tsp red wine vinegar, and the one I adapted this from called for 4 tbsp of olive oil and it was too much, so I had to add some cream to combat the strong olive oil flavor)
1 tbsp dijon mustard (when I make this again, I will put less mustard in so I won't need so much cream)
1 tbsp water
2-3 tbsp. heavy cream
salt and pepper

Boil the eggs (you can just boil them in a saucepan with water almost covering them to save dishes) for 10 minutes. Cool eggs in ice water and then peel. Cut eggs (like you would for deviled eggs) and remove yolks. Mash the yolks with a fork and add in the garlic, parsley, milk and salt and pepper. Stuff the eggs with the mixture, reserving 2-3 tablespoons for the dressing. Make sure the stuffing is flush with the eggs.

Heat a couple tablespoons of oil in the saucepan. Place eggs in the saucepan, yolk side down. Fry until golden, about 4-6 minutes. Place on a paper towel lined plate.

For the dressing: Mix all of the ingredients together and taste and correct seasoning as necessary. You might want to put in a little less olive oil or you could try using the red wine vinegar.

To assemble: Place on a plate and drizzle dressing over top. Sprinkle with parsley (or chives, etc. if using another herb). Serve with hot, buttered toast for breakfast or a salad for lunch.
 I am sharing this recipe because it is just so absolutely, wonderfully delicious. I think I may go and make this right now.

Friday, March 29, 2013

In the Kitchen: Meringue and Whipped Cream Sandwiches

These dainty little treats are quite sweet and the airy, crunchy texture is perfect. I made them for the Easter weekend since they just seemed the right sort of dessert "cookie" for spring.

Don't be confused, these sandwiches are way bigger than they look! Next time I make them, I will make much smaller dollops (or pipe them) on the cookie sheet.
Meringue and Whipped Cream Sandwiches
4 egg whites
1 1/4 cups granulated sugar
Whipped Cream (about a 1-1 1/2 cups of cream whipped with a 1/2 tsp vanilla and a tbsp. of powdered sugar)

Preheat the oven to 200* F.

Beat the egg whites until stiff, but not dry (still foamy). Fold in half of the sugar and then beat on high speed until stiff and dry (more like marshmallow creme). Fold in the rest of the sugar and briefly beat to combine. Divide the "fluff" into two bowls and add a tiny bit of food coloring to each bowl. I did green and pink (springy and all that). You don't want to use much since you want the meringues to be a pastel color.

{I really do not like to use food coloring ever, but I used very little in this recipe. I have heard you can buy food coloring that is not made with Red 40, etc., so I need to find it!}


Spoon the "fluff" onto a cookie sheet. Make them small! I made them too large so they were a bit of a mouthful when you sandwiched them together. You could also pipe the meringues onto the cookie sheet and they would probably be very pretty. Bake at 200 for 3 1/2 -4 hours. Yep, they take a long time. They are ready when they are firm, can be fairly easily removed from the cookie sheet and have started to crack just a little.

Once cool, spread with whipped cream and sandwich together with another cookie. I doubled this recipe when I made it since I was making these to give to people, so I am unsure of how many this recipe makes (I also made mine too big). I think a single recipe would be plenty for our family and some neighbors, so I don't think you would need to double it unless you were feeding a ton of people.

I hope everyone has a Happy Easter!

Recipe from: The Complete Book of Irish Country Cooking by Darina Allen

Thursday, February 21, 2013

In the Kitchen: Chocolate Decadence with Raspberry Sauce and Whipped Cream

I put up a tantalizing picture of this delicious dessert in my post about Valentine's Day and then promised to share the recipe. I plan on keeping that promise, so now you can go and make this yummy dessert yourself.
{side note}Have I ever mentioned how much I love cooking and baking? I suppose you might have guessed considering how many recipes I have posted. I love making food from scratch and enjoying the fact that it tastes so good. I do like to go out to eat and to order dessert, etc., but there is something nice about making it yourself. Of course, there is something nice about not having to make it yourself as well. 
 This dessert is chocolatey. Really. It is even chocolatey enough to be completely satisfied while watching the movie Chocolat.

Oh, and this is another one of my mom's recipes. She would make this every Valentine's Day. I and my siblings were lucky children. Recipe? Here you go:

For the cake you need:
16 oz. quality bittersweet chocolate, chopped
10 tablespoons butter
4 eggs
1 tablespoon sugar
1 tablespoon flour

How to:

Preheat oven to 425 degree F. Butter and flour an 8-inch round cake pan. If you have parchment paper and feel like cutting out a circle, you can and then line it to the bottom of the pan (it does make it easier to get it out).

Place chocolate and butter in a double boiler (or metal/glass bowl) and set in a pot over simmering water. Stir until smooth. Set aside and cool.

In another double boiler or bowl (or the same one cleaned out) over hot water, combine the eggs and sugar. Whisk until the sugar is dissolved (put a dab of the egg mixture on your finger and rub a bit of it between your fingers, if still grainy keep whisking, if smooth, remove from heat). Remove from heat and beat 5-10 minutes with an electric mixer until thick and light. Fold flour into egg mixture. Fold a third  of the egg mixture into the chocolate. Add remaining egg mixture to chocolate and fold in. Pour into prepared pan. Bake 15 minutes. Let cool and then freeze overnight. If you do not have that sort of time freeze for a least 3 or 4 hours. It tastes better if frozen overnight however. Remove from pan by dipping the bottom of the pan in hot water and then tipping upside down.

Raspberry Sauce:
1 10 oz bag of frozen raspberries
2-3 tablespoons sugar

Heat raspberries an sugar on the stove in a small sauce pan or in the microwave. Mix until the sauce is to the desired consistency.

Whipped Cream:
1 cup heavy whipping cream
1 tablespoon powdered sugar
1 tsp. vanilla
Whip the cream using an electric mixer. When almost done add the vanilla and sugar, then whip some more until done (make sure to not over do it and turn your cream to butter from too much mixing).

To assemble:
Cut a small slice of the cake (it is very rich), top with the warm raspberry sauce and then the whipped cream. Enjoy!
This is a very tasty dessert and not all that difficult to make and very delicious to consume. So try and make it and let me know what you think!

Wednesday, February 6, 2013

In the Kitchen: Chocolate Ice Cream with Chocolate Sauce and Chopped Almonds

Yum. I can't stop looking at this picture. 

Tyler and I got an old-fashioned crank ice cream maker for Christmas from Tyler's mom and step-dad. We love it! We love how the old ones look, which is why they thought to get us one and fix it up. Here are a few awesome things about this maker:

1. It can't really break. There is no motor, no electric anything, just you cranking the thing. If a piece breaks (unlikely), you can easily fix it. 

2. It can make a ton of ice cream. Most electric mixers make fairly small amounts of ice cream. We have made double batches (1/2 gallon) and there is still plenty of room. Most new ice cream makers make a quart of ice cream, so it is nice to have more, especially if we are having people over.

3. It is aesthetically pleasing.

4. Man power. So far, Tyler has been the one to churn it, but I like that you can control the speed and check and see how it is doing. 

5. It makes good ice cream that has a great texture. 


We have made a few different ice cream flavors so far and we really like the chocolate ice cream recipe from Annie's Eats, which is the one pictured above. Ice cream is really quite simple to make but it takes quite a bit of time. It is essentially like making a custard (if the recipe does not have eggs or cream in it do not bother making it--unless it is gelato or sorbet or something and that is completely different). You cook the mixture on the stove, doing the whole tempering eggs thing, and then that mixture has to chill in the fridge....for a long time. It has to be really cold before you can churn it and so does the bowl/ice cream holder thing that is inside your maker. After it is chilled, you start churning using ice (or snow in our case) and lots of rock salt to keep the whole thing cold, or you just put it in your machine. Once it is done, the texture is like soft serve so you freeze it (in a tupperware) for a few hours or overnight for the best texture. There is a lot of waiting involved, but it is so worth it. Homemade ice cream is the best, plus you know exactly what is in it and are not eating a ton of that high fructose corn syrup garbage that is sadly in most store bought ice creams now.

I also made a chocolate sauce to go with this ice cream because I sort of really like chocolate. Quality chocolate. Please, please use quality chocolate to make this ice cream and sauce! I am not saying you have to buy a $7 bar of chocolate, but at least use the Ghirardelli 60% cacao baking chips. 

 This is chocolate sauce, not chocolate syrup or hot fudge. I made this recipe simply because I had all of the ingredients. It is thicker than syrup, but not at thick as fudge and very chocolatey.

Chocolate Sauce
6 oz. quality chocolate
1/2 cup heavy whipping cream
6 tbsp. water
pinch of salt

Combine all of the ingredients in a double boiler over simmering water (or if you don't have a double boiler, like me, put a glass or metal bowl inside of pot with simmering water in it). Whisk until smooth. Serve warm over ice cream or anything in need of a chocolate sauce. Keep in a glass jar in the refrigerator. Warm up in the microwave or on the stovetop (put glass jar in a pot of hot water) and stir before serving.

To make what I did in the picture, put your chocolate ice cream in a bowl or glass, spoon the hot chocolate sauce on top and sprinkle with chopped almonds.

Enjoy!

Chocolate Sauce recipe from Luscious Chocolate Desserts by Lori Longbotham.

Monday, December 3, 2012

In the Kitchen: Pumpkin Pancakes with Buttermilk Syrup

So, this is not my recipe and my pictures are not even nearly as good as the blog this is from, but hey, my camera is old and not suited to indoor pictures. Whatever the case, you should make these pancakes tomorrow or if it is easier you can wait until Saturday, but oh my goodness, they are delicious!
Oh, and did I say something about Buttermilk Syrup? This stuff is delicious. I had never had it until we had a Primary breakfast before the Primary Program a few weeks ago. Is it a Utah/ mid-west thing? It is easy to make, delicious and tastes like Butterbeer. Seriously, it tastes like how I imagine Butterbeer to taste, it just needs to be diluted with some club soda. I now need to try that.
These pancakes are perfect. Elanor ate 2 1/2 pancakes--which is a lot for someone of her small size. We all loved them!
Get the recipe for the pancakes here. I recommend making your own pumpkin puree, instead of buying the canned stuff. It is a heck of a lot cheaper and it tastes better. All you need to do is buy yourself a pie pumpkin from the grocery store, roast it like you would a squash and then blend it with a little water in a blender. Done and done, plus is makes quite a lot of puree to use anytime!

As for the syrup, well I will provide the recipe, but it is not mine. I got the recipe here.

Buttermilk Syrup
This recipe makes a lot of syrup (we had an extra 3 medium size mason jars of syrup left over), especially if you are a small family like we are. You can bottle up the syrup and keep it in the fridge and it will last for quite a while (several weeks) or you can half the recipe (you will still have extras). Also, cook this in a pretty large pot since the syrup bubbles up a lot when you add the baking soda.

1 1/2 cups (3 sticks) butter
1 1/2 cups buttermilk
3 cups sugar
1 tsp vanilla
3 tsp baking soda

Bring the butter, buttermilk and sugar to a boil, stirring pretty much the whole time. Once boiling, remove from the heat and stir in the vanilla and baking soda. Serve hot!

*Since this syrup already has a ton of butter, you don't need any butter for your pancakes.

Enjoy, this syrup really is quite tasty.

Saturday, October 27, 2012

In the Kitchen: Pumpkin Bread

Here is another Harry potter recipe! I am actually doing this one on time, imagine that! Pumpkin bread is not specifically mentioned, but in Book 1, Harry wakes up to the smell of baking pumpkin on Halloween day. Dinah Bucholz (author of the cookbook), included a pumpkin pie and pumpkin bread recipe to go with the smell of baking pumpkin. Yum!
This pumpkin bread does not disappoint. It is delicious. So, juts in time for Halloween, make yourself a loaf of this tasty bread!

Pumpkin Bread
1 1/2 cups flour
1/4 tsp. salt
1 tsp. baking powder
1 tsp. cinnamon
1/4 tsp. ground nutmeg
1/8 tsp. ground cloves
1/2 cup butter (1 stick),  at room temperature
1 cup granulated sugar
2 large eggs
3/4 cup pureed pumpkin (don't use pumpkin pie mix)
1/3 cup whole milk
Confectioner's sugar, for dusting

Preheat the oven to 350 degrees. Grease and flour a loaf pan.

Whisk together the flour, salt, baking powder, cinnamon, nutmeg, and cloves in a medium bowl. Set aside.

In a separate bowl or mixer, beat the butter and sugar until light and fluffy, about 4 minutes. Add the eggs in one at a time, beating after each until incorporated. Add the pumpkin and beat until combined. Add the milk and beat until combined. Add the flour mixture and beat on low speed until combined. Using a rubber spatula, scrape and fold to finish.

Pour/scrape the batter into the prepared loaf pan. Bake for 1 hour, rotating halfway through baking. Bake until the loaf is feel risen and feels firm.  Remove from oven and cool in pan, before removing it from pan. Dust with confectioner's sugar, if desired.

I also really like to spread cream cheese on pumpkin bread.

Book update: I am over halfway through Book 4. I really have not been reading all that often ( I mostly just read right before bed). I need to read a lot this week. I might not finish.... I am giving myself until my party, which will be next weekend.
I hope you all have a Happy Halloween!

We sure will with this happy, little princess!

Saturday, October 13, 2012

In the Kitchen: Jam Tarts (HP recipe)

Here is yet another Harry Potter recipe for Harry Potter Month. Jam tarts are very easy and delicious treats. They are basically like little pies with jam for the filling. Jam tarts are mentioned in the fourth Harry Potter book (The Goblet of Fire) when Fred and George are testing out all of their joke shop experiments during the Gryffindor victory party following the first task. Hermione passes on the Weasley twins' jam tarts, thus they are mentioned (ch. 21).


Monday, October 8, 2012

In the Kitchen: Harry Potter Recipe

*This recipe is for last week's recipe, I will put up one this week as well.

I am excited to share this recipe with you! It is tasty and perfect for chilly fall days.  As promised it is a Harry Potter recipe, as they will be all month for Harry Potter Month.  It is, of course, from my Harry Potter cookbook. I made Beef Stew with Herb Dumplings. This cookbook has a recipe for anytime food is mentioned at all in the books and this one happens to be from the 7th book. When Harry, Ron and Hermione were briefly staying at Grimmauld Place, and they were finally on good terms with Kreacher, Kreacher made them some very delicious meals. One of which, was a stew (chapter 12). So here is the recipe Dinah Bucholz (author of the cookbook) decided to put down for Kreacher's stew:

Beef Stew with Herb Dumplings
*note--This recipes takes a long time to make, but it is not difficult. Allow yourself about 3 hours from start to finish. Also, we gobbled up the stew before I remembered to take pictures. I only have some pictures of empty bowls and the empty soup pot.  See:

Lame. Sorry. 
(keep reading, there are pictures of Elanor...)

Tuesday, September 25, 2012

In the Kitchen: Second Breakfast

I feel like I have been going almost non-stop since Friday and anytime I have sat down to relax for a minute I have not felt like blogging. So, I am extra sorry about not having an "In the Kitchen" for this past weekend, so today will have to do.

The table, nothing fancy, just good food.
Is anyone else as into Tolkein's books (aka The Hobbit and The Lord of the Rings) as I am? I love, love, love them. The movies are mostly pretty wonderful as well. Anyways, it was the 75th anniversary of The Hobbit last Friday and some group or other was putting on this second breakfast thing (since hobbits love food...as do I) on the internet. Basically, they wanted everyone around the world to celebrate The Hobbit by having  a second breakfast. They even provided a beautiful, free, printable bunting, along with other things. Luckily, our new upstairs neighbors (well, Becky, that is) is just as into Tolkein as I am! So, we had her and her twins over for a little second breakfast. We had a lot of fun and it went as well as any little party can with three toddlers, not quite enough chairs, and a bowl of sugar cubes.

 
Three little hobbits.
I made Caraway Seed Cake (sorry, Mom, I did not make yours, mostly because I went to one store for the stuff and they did not have imitation brandy, but did have caraway seeds, and I did not feel like making another trip).  I love Caraway Seed Cake! It has a very distinctive flavor, and is sweet, but not really in the cake way. It is more like a sweet bread, is great with tea (we had licorice spice) and is very British. I made a recipe that bakes it in a loaf pan (many recipes bake it in a cake pan), because there were only two of us (and three little hobbits). I also made Mushrooms with Bacon and Sage, which when I think of hobbit food, I think of the food Farmer Cotton serves the four hobbits. Anyone following? Anyways he serves some sort of bacon and mushroom dish and I wanted to make that. It was delicious. I could eat a whole bowl of it. Yum.
The seed cake,  not the best picture, but I had little ones keeping me busy...
Recipe for seed cake here.

Recipe for mushroom and bacon dish here.

Becky also made some delicious strawberry jam scones, which I don't have the recipe for, but my mom's recipe for scones is here.
The Hobbit bunting--beautiful! In between each letter is a painting from the story (i.e. Hobbiton, Rivendell, Misty Mountains, eagles, and Smaug).

 We had a fun time and good food. Anyone want to do a bigger version of this for "The Hobbit"movie coming out December 14? I know I do.

Friday, September 14, 2012

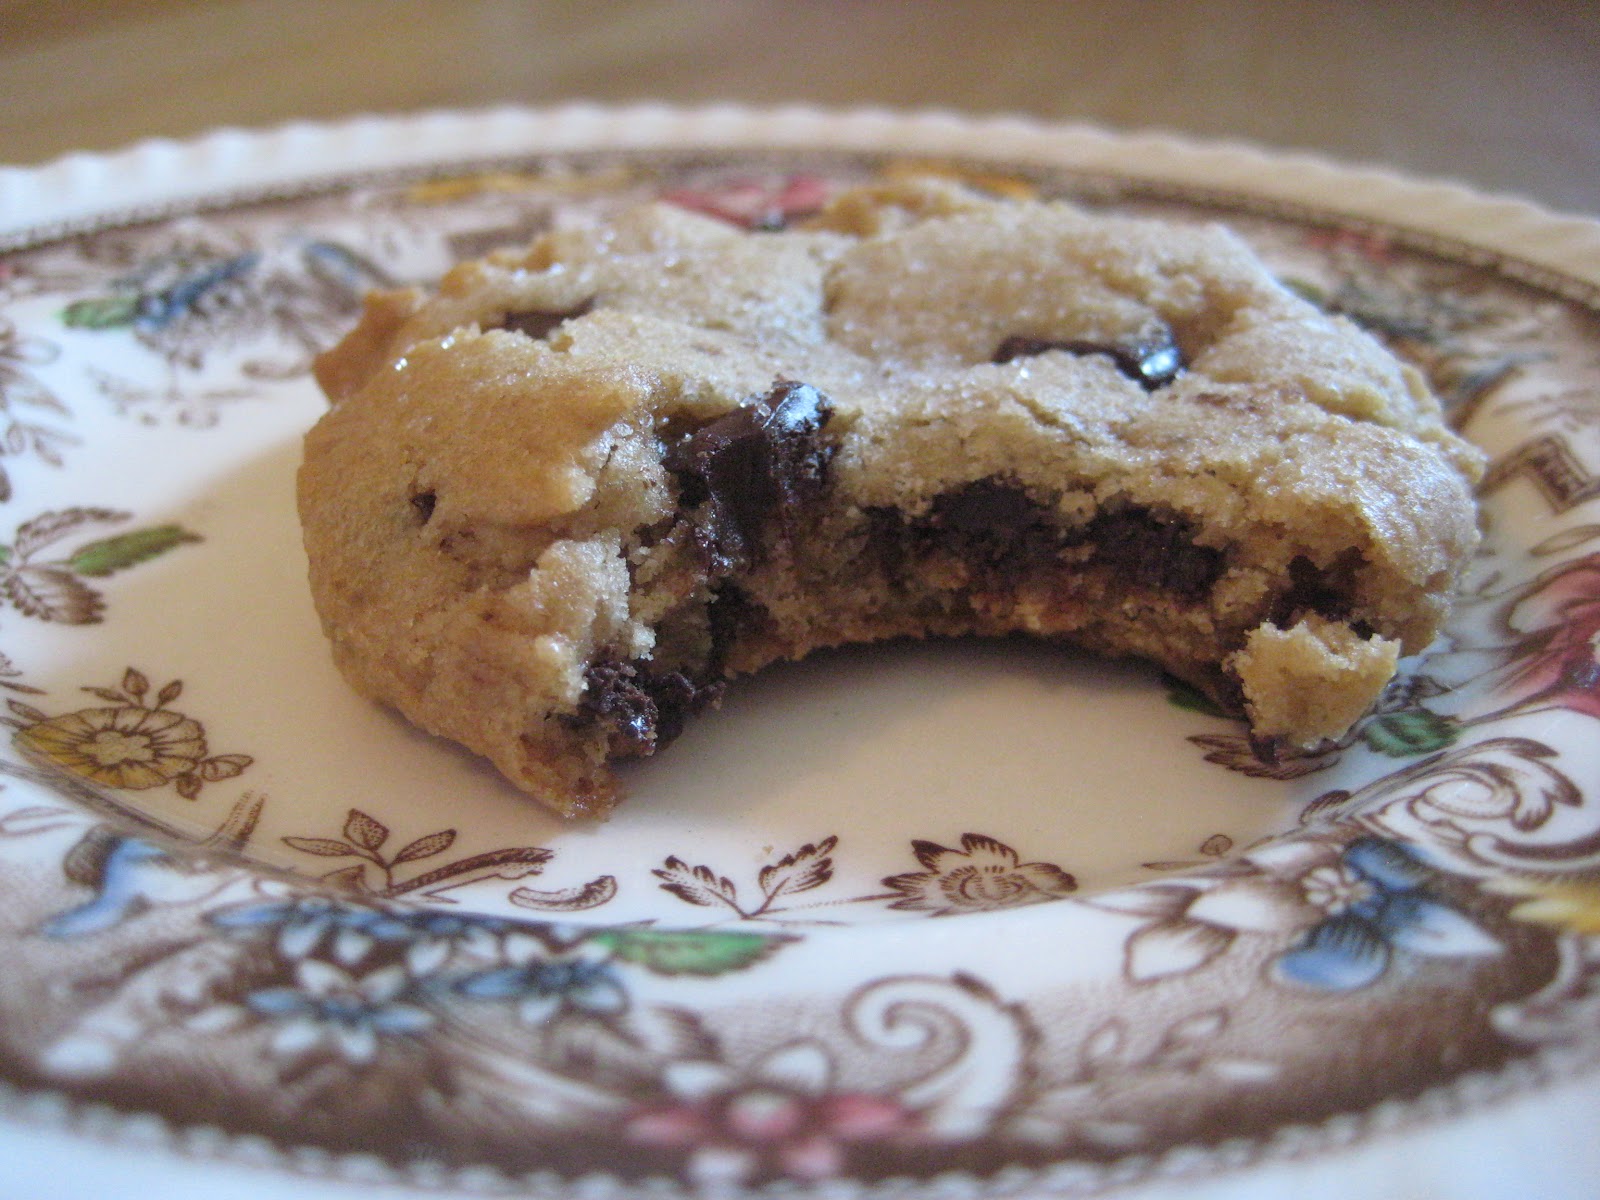
In the Kitchen: Chocolate Chip Cookies

I am always trying new chocolate chip cookie recipes. If I see one that is claiming to be the best, then I have to try it. I saw this recipe on pinterest and it led me to the to the blog Not Without Salt. So, no this is not my recipe and no I am not going to type up the whole recipe on here since you can just go straight to her blog to get it.
 Get the recipe here.

 These are delicious cookies, which is why I bothered to share them, even if they are not my creation. I still need to try the NY Times chocolate chip cookie which is all over pinterest and claims to be the best. So, whenever I make that cookie I will post it and let you know what I think.

These cookies are nice and chewy. They are bit salty (in a good way), with a pleasant crunchiness to them (which comes form the turbinado sugar). This really is a very good cookie-----but you have to use quality chocolate!!!! No cheapo, waxy chocolate chips should be used here (or ever). If you want to save a little money use the Ghiradelli 60% cacao baking chips or the Whole Foods Dark Chocolate Chunks. They are each about $3.99 a bag, but you can find them on sale sometimes. I used the Whole Foods ones since I had them on hand and they are very good. However, if you have the means, get the good stuff (a Valrhona bar or something similar) and chop it up. It will be delicious.
Elanor approves, so I am sure you will!

Happy Baking!

Saturday, September 8, 2012

In the Kitchen: Meat and Potato Pie

I love pie. Fruit pies, cream pies, meat pies---all delicious.  I really, really love savory pies. They are the perfect comfort food. Filling, tasty, warm, and so homey. 

So, today I have a recipe for a meat and potato pie from my handy dandy Harry Potter cookbook. I promise it is easy to make (some meat pies can be a bit more laborious). If you have never made or even tasted a meat pie, this is a great beginner recipe.

Friday, April 13, 2012

In the Kitchen: My Mom's Scones

So maybe I'm on a roll here with my mom's recipes...but hey, she is an amazing cook and I use her recipes all the time! I am so lucky that I grew up with a mom who is an excellent cook/baker and also gave me ample opportunities to help her and use the kitchen. 


These scones are wonderful. Simple, but definitely gets the point across and is a great vehicle for jam (which is how my brother, Erik, uses scones or any form of bread). Scones are also great because they are easy to vary; add chocolate chips, nuts, raisins or whatever you have around. I prefer them plain with butter and jam, with a cup of tea (preferably mint or licorice spice).